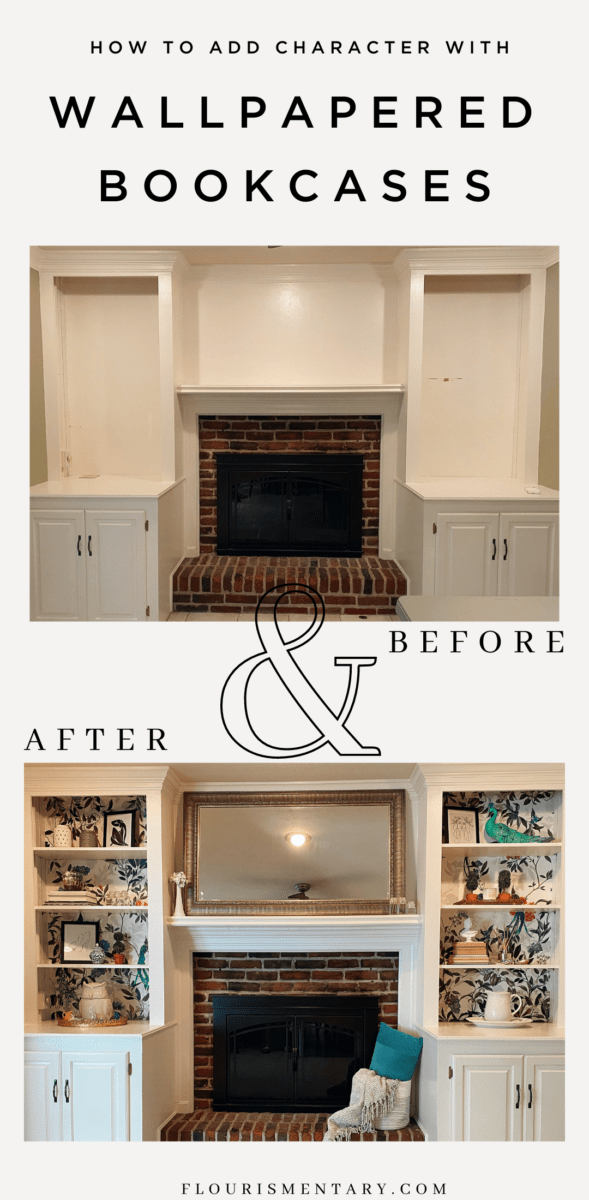
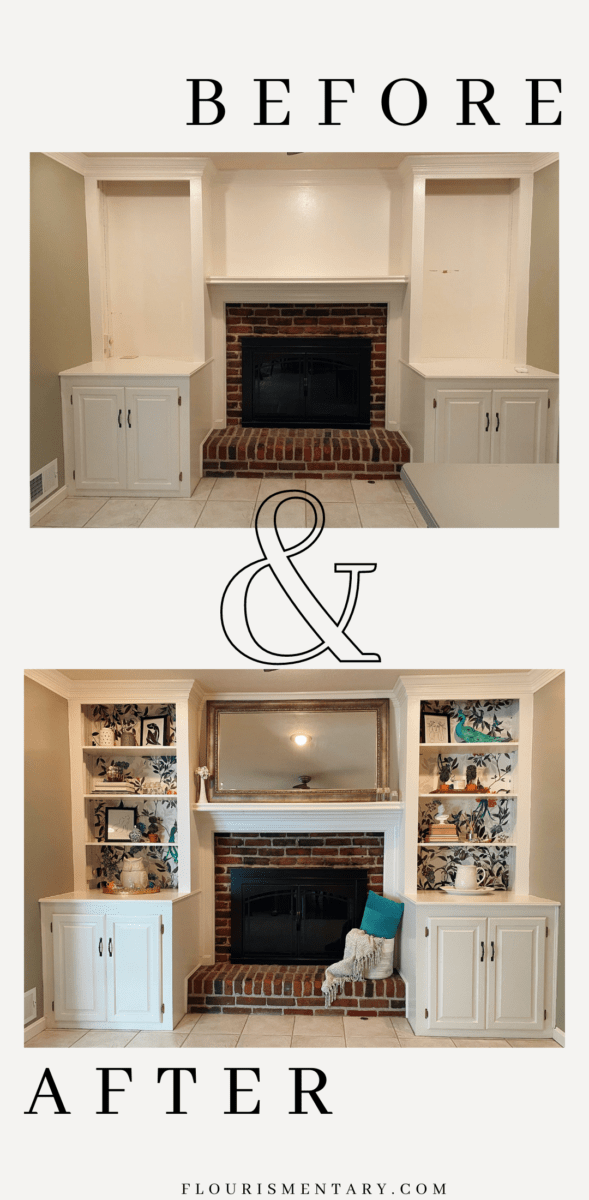
When we moved into our house, I was so excited about our built in bookcases. They were a blank slate, and I instantly knew the trend of wallpaper on bookshelves would be perfect to try in this space!
Since these shelves frame our fireplace in the eat in kitchen, they’re the focal point of the room. They have nice trim, but really were missing that a pop of character to make them stand out!
I knew focusing on decorating them would make a big impact, and I’m happy to say it has totally transformed the entire space!
Here is my step by step guide for redecorating your bookcases with wallpaper!
Step 1. Choose Your Wallpaper Wisely
When choosing a wallpaper for our bookshelves, I knew I had to keep in mind a few things. I wanted something that would compliment the nearby paint colors in the kitchen, and all the trees you can see from the adjacent sunroom.
I also knew an organic pattern would work best since I didn’t want both sets of shelves to look exactly the same. Plus organic patterns with a lot of variation would be more forgiving since the built ins aren’t perfectly straight.
Finally I needed a paper that wasn’t super delicate. I knew putting the shelves back in, and resting objects against the wallpaper could scratch it, so I needed a paper that would stand up to the task.
When I had the chance to learn about a European company called Photowall, I was instantly intrigued by their premium wallpapers. They have an extra layer that makes them wipeable and extra resistant to scrapes, and they have thousands of unique designs to choose from!
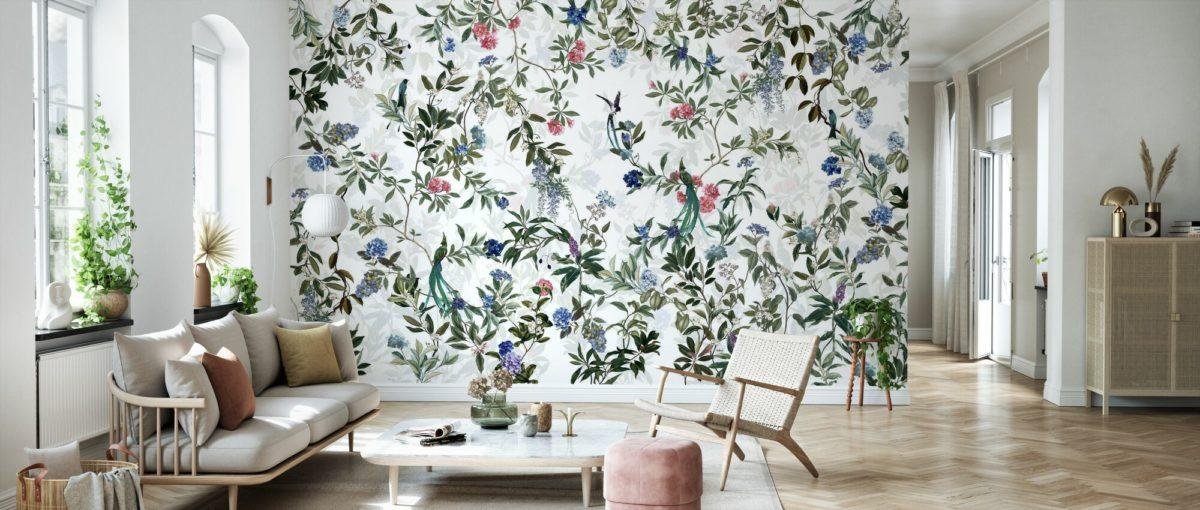
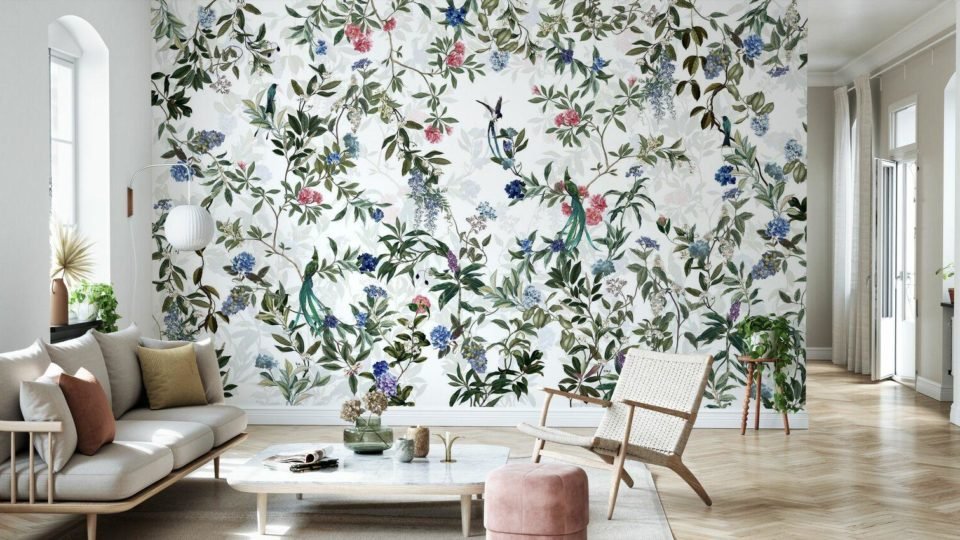
When Photowall asked if I was interested in trying out their wallpapers, it was easy to filter through colors and styles to find the perfect match! I landed on this gorgeous pattern called “Magic Forest” in the “Bright” colorway and I couldn’t be happier with it. You can read a little more about their wallpaper at the bottom of this post.
Take all of these kinds of things into consideration when you are choosing wallpaper for bookshelves, so you can find one you’ll love for years to come.
Pro Tip: Order 2.5 to 4 inches extra for both the width and length. Because no surface is ever perfectly plumb and it’s nice to have a little extra paper for a margin of error.
Step 2: Prepare The Surface To Be Wallpapered
Once you have the perfect wallpaper, it’s time to use it!
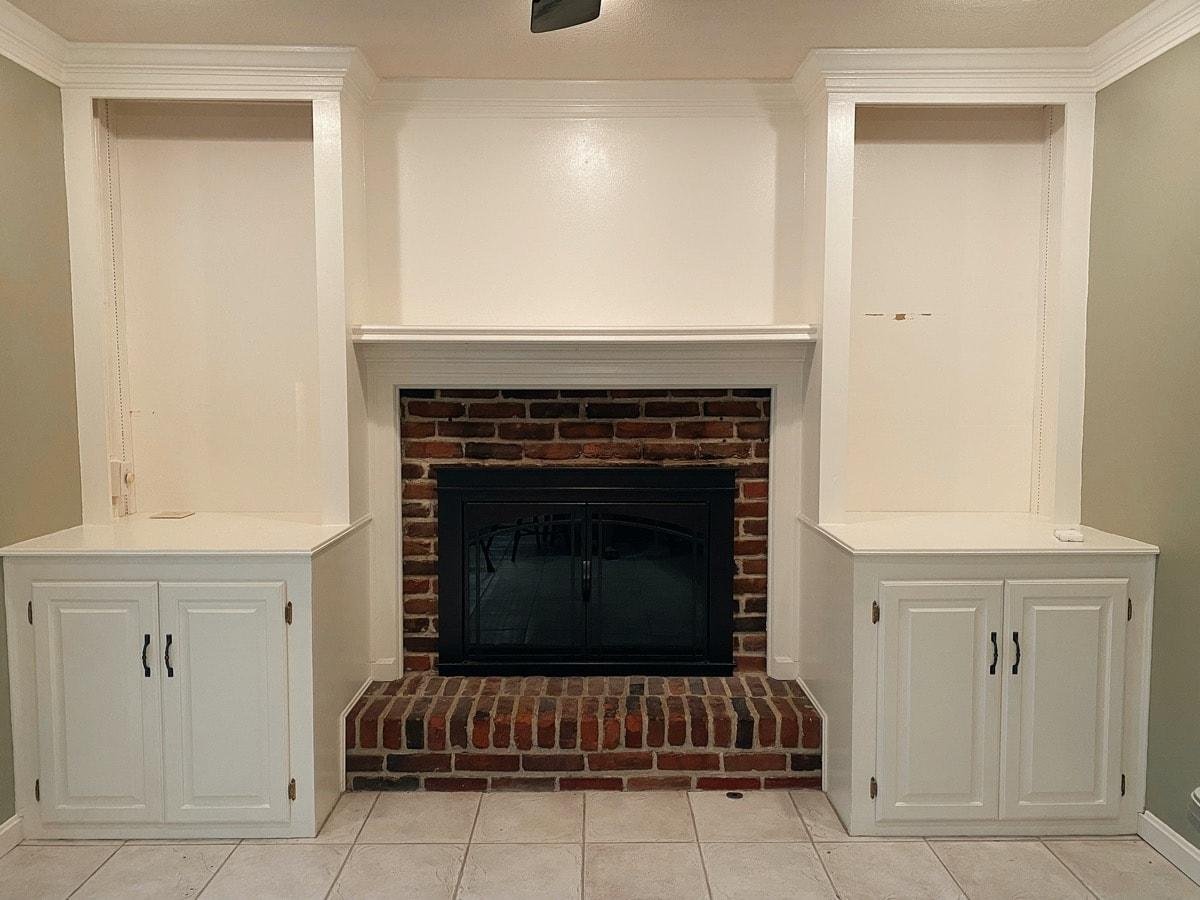
Start by removing everything from the shelves, and then remove the shelves themselves. This project is best suited for a bookcase with removable shelves, but you can also do with static shelves (it’ll just take some extra work).
Next you’ll want to clean the back of the shelves where you are hanging the wallpaper. Mine were painted wood, so I cleaned them with a sponge and a homemade cleaner. I made a solution mixing white vinegar, a drop of dish soap, and a little warm water.
The sponge helped get rid of any make sure any dust, and debris leaving behind a clean surface. If you have any areas with deep dents or scratches, you may want to repair those before hanging any wallpaper on your bookshelves.
Pro Tip: Mark the location where your shelves were hung with a light pencil mark, and save yourself some time figuring out how to get them perfectly back into place.
Step 3. Gather All Your Materials
I didn’t have many wallpaper hanging supplies lying around the house, so I was pleased to find that wallpaper paste was included in my wallpaper order from Photowall.
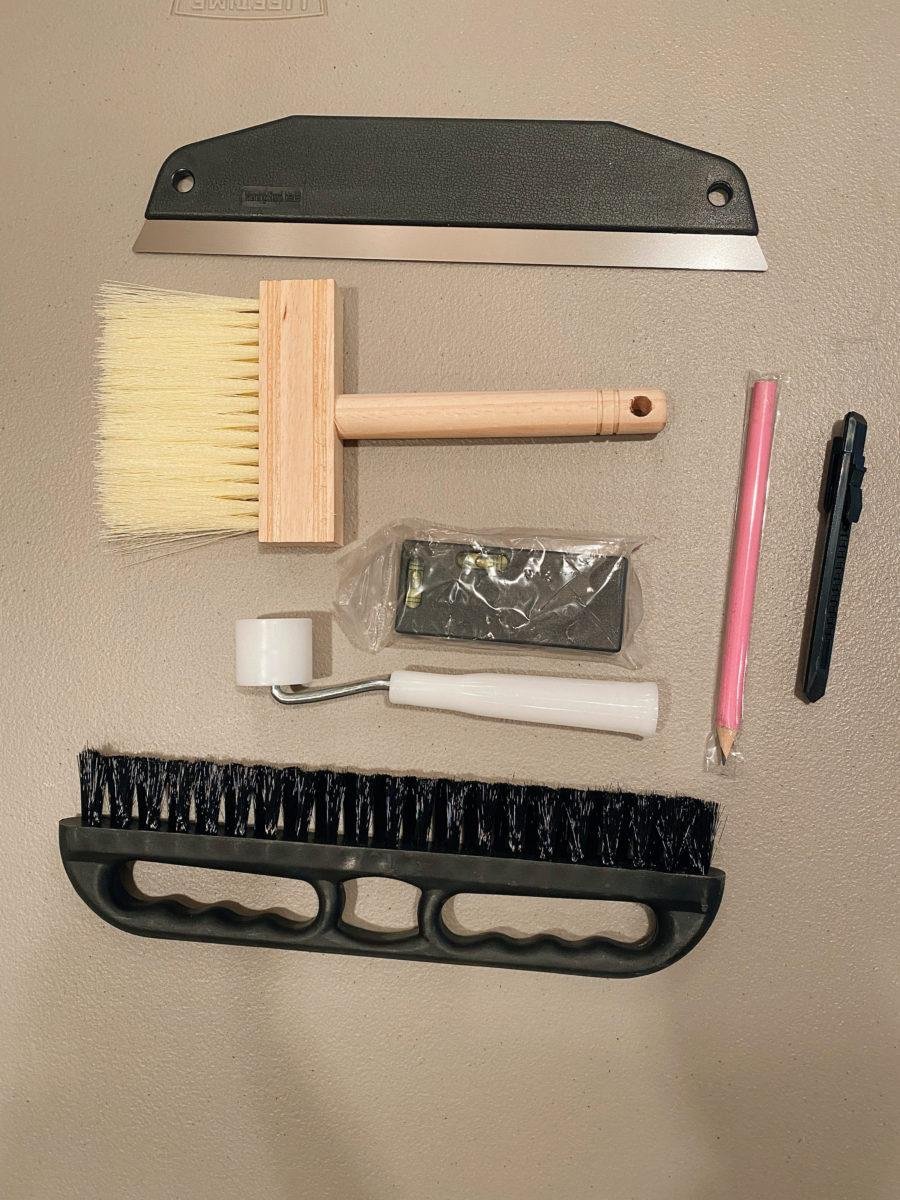
They also have a really useful Wallpaper Assembly Kit with everything else I needed to complete the job! You’ll also want to have an extra set of hands around to help you hang your wallpaper.
Here is a list of all the materials I laid out before I began, plus what was included in the assembly kit.
- My Wallpaper (Obviously)
- A Folding Table (As a work surface)
- Wallpaper Paste
- Scissors
- A Bucket
- A Wooden Paint stir stick
Wallpaper Assembly Kit From Photowall
- Brush for applying Wallpaper Paste
- Seam roller for making the seams invisible
- Paperhanging brush for smoothing the strips
- Small boxcutter style knife
- Cutting guide for trimming excess wallpaper
- Bubble level with a built in tape measure.
- Pencil
Pro tip-If your shelves are adjustable, go ahead and mark them with a light pencil where you want them hung so you don’t have to make any adjustments when you put them back.
Step 3. Prepare The Wallpaper & Wallpaper Paste
Start by preparing your wallpaper, and making sure you have plenty of paper needed to cover the bookshelves.
Photowall wallpaper comes in one continuous roll, with all the panels numbered in the order they will be hung from left to right (Panel 1 of 3 etc, Panel 2 or 3 etc.) I started by cutting Panel 1 off of the roll, and then lined up all the panels in order.
Next I measured the width of the first wallpaper panel. Then I went to my bookcase and made a mark on the wall at the same width, to show me where that panel will end after it’s applied. Then I took a pencil and my level measuring tape, and drew a light pencil mark to create a perfectly level “guiding line” for my wallpaper.
After that I prepared the wallpaper paste that was included with the kit. I poured a gallon of warm water inside a bucket, and slowly added the powder while stirring with a paint stir stick.
I let the paste sit 5 minutes until it becomes really thick -but don’t worry about letting it sit too long, you will have plenty of time to work with it!
Step 4: Apply The Wallpaper Paste
Next you’re ready to apply your wallpaper paste!
Remember that guiding line I just made? I covered the back of the bookcase with a thick coat of wallpaper paste extending just slightly past my pencil mark.
You only want to cover the area with wallpaper paste for one area at a time, otherwise the paste may dry before you can hang all the paper.
Pro tip: A lot of times first time wallpapers will apply a really thin coat, which can cause air bubbles with the paper when it dries. Avoid this by quickly applying a nice, even layer.
Step 4: Hang the wallpaper panel
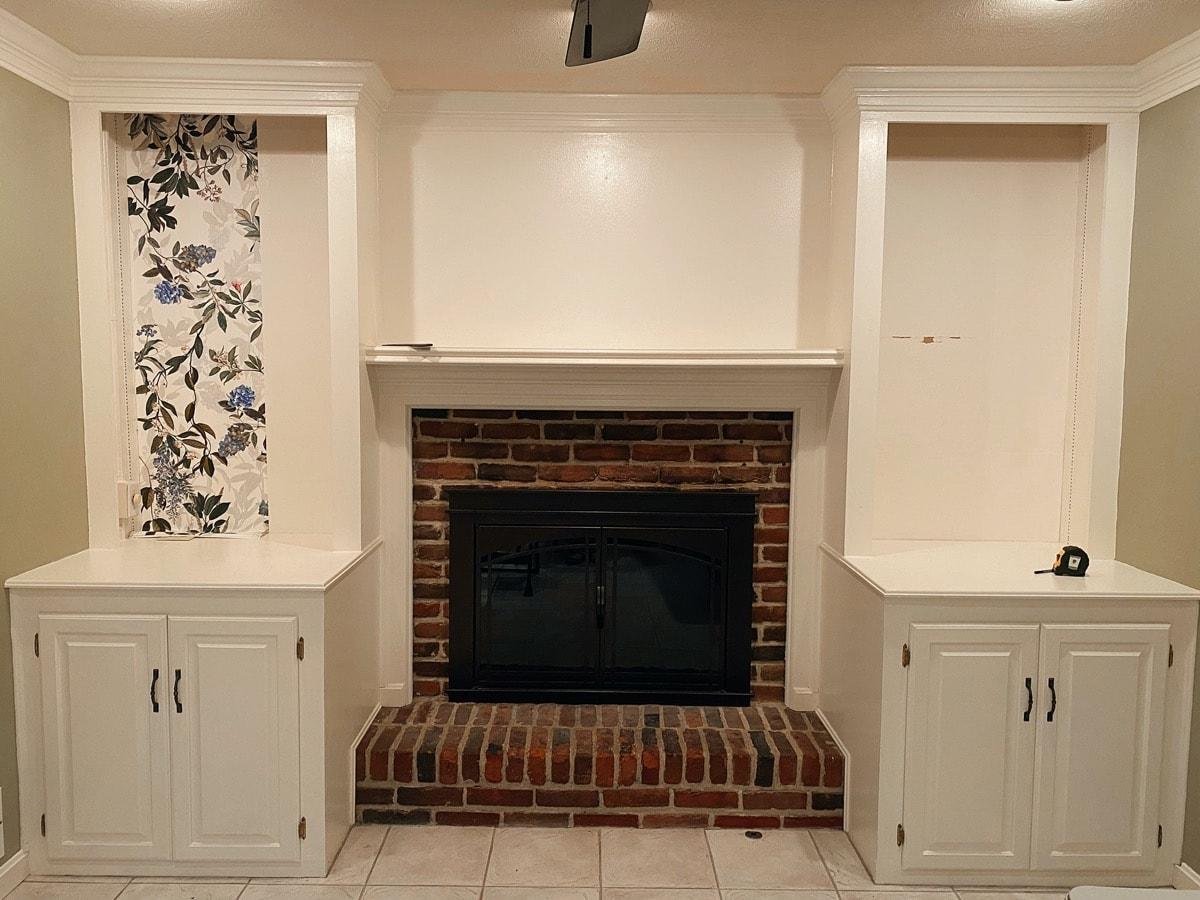
Starting a the top left corner of the surface, hang your wallpaper flush with the top surface.
I used my hands smooth it across horizontally, and then started applying down the wall, vertically.
Check the edges to make sure they’re lining up with the far left edge, and the line you drew with pencil on the right.
Once you have it in place, take your paper hanging brush to use as a smoothing tool. Smooth out any bumps in the paper and make sure it’s perfectly flat against the surface.
If you need to adjust it a bit, firmly push it into place while the wallpaper paste is still freshly applied. Finally you can wipe away any excess paste that spilled out over the edges. Using a premium wallpaper that is wipeable makes this step much easier!
Step 5: Hang The Second Wallpaper Panel
If you need two panels or more to go across the width of your shelf, follow the directions in step 4, until the edges of the second panel line up with the design on the first panel.
In my shelves I used scissors to cut away a little extra width on the second panel, while leaving plenty for a margin of error. I did that before I hung the paper to make it a little easier to fit in the narrow space, and then used the edge tool and box cutter to make the final trim.
Next I used the seam roller make sure the seams were perfectly pressed together! I stepped back to look at my work and made any final tweaks before smoothing it over with the hanging brush. Repeat these steps for each remaining section.
Step 6. Let The Wallpaper Dry!
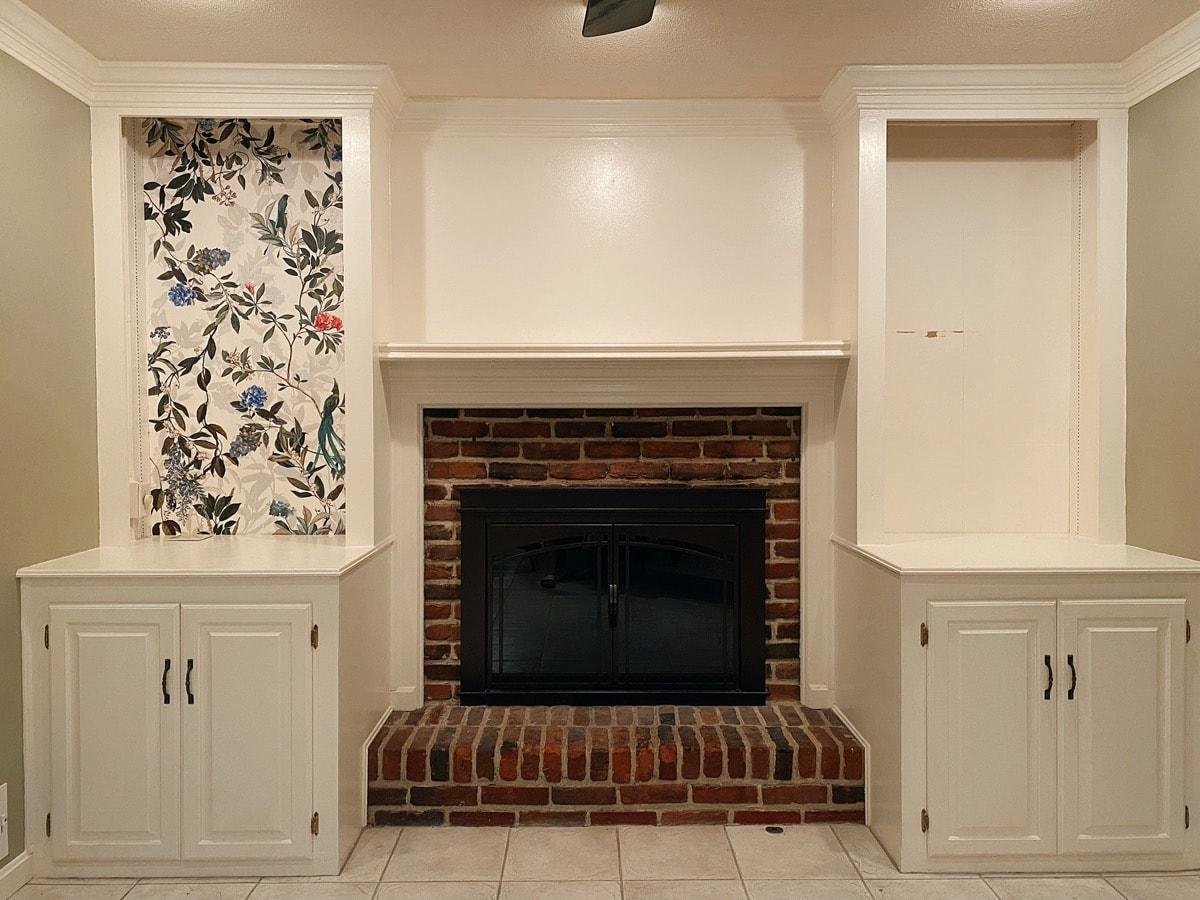
It’s tempting to want to put back all the shelves to see the final product, however it’s really important to give your wallpaper ample time to dry.
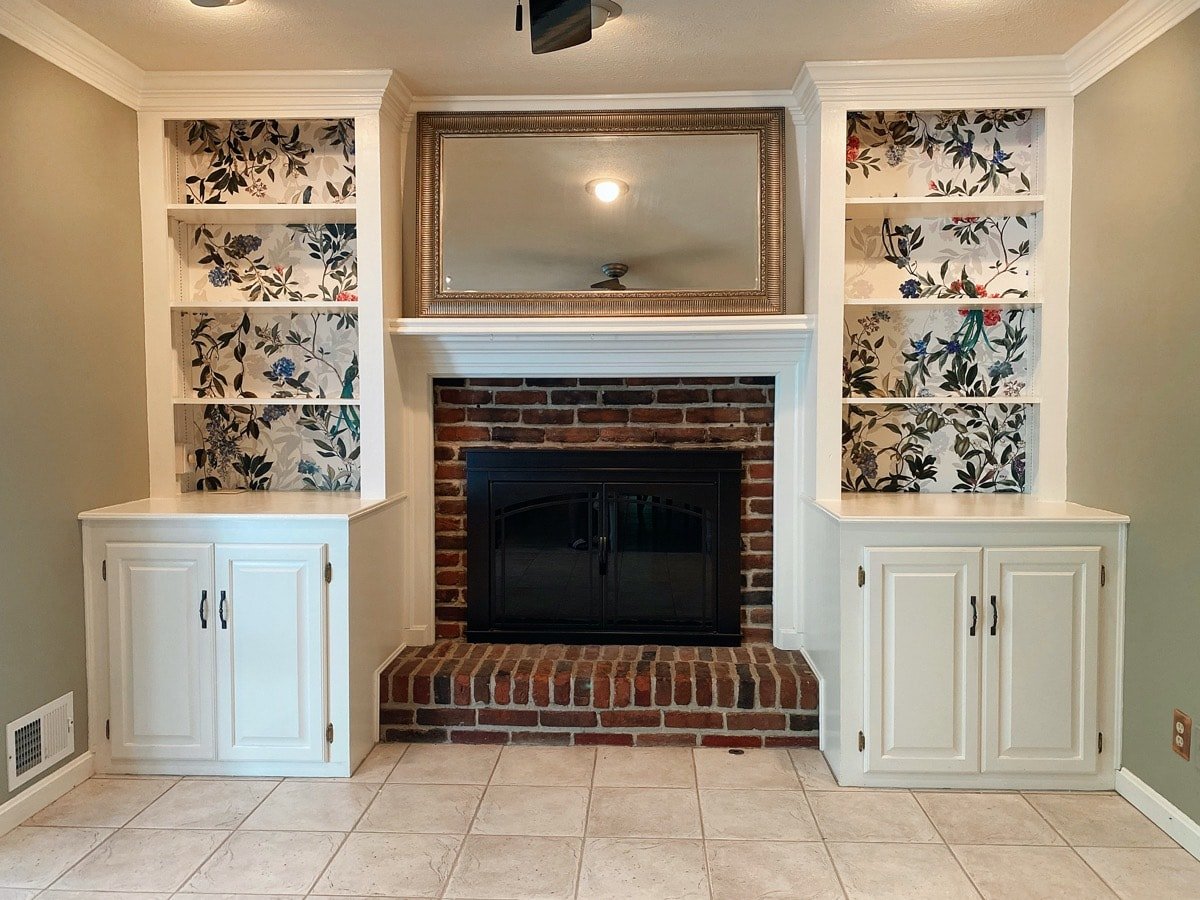
Especially since my shelves were painted wood, I gave them a full 48 hrs before I hung my shelves back on the wall and got to see how they would look! It was hard to wait but well worth it knowing my paper was perfectly placed!
Step 7: Decorate & Enjoy!
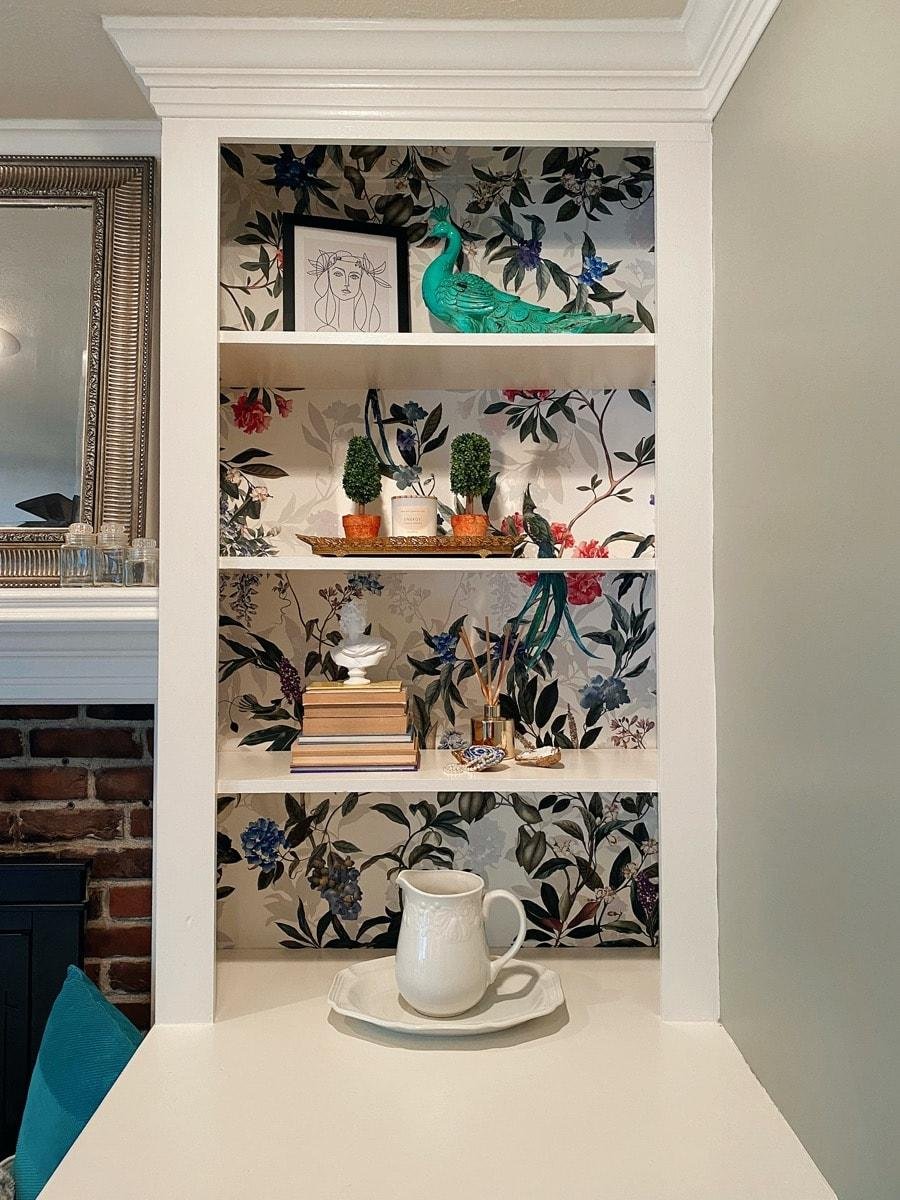
Here come the fun part! Decorating your bookshelves with wallpaper helps breathe new life into your space, and will inspire you to decorate with items in a way you may have never used before!
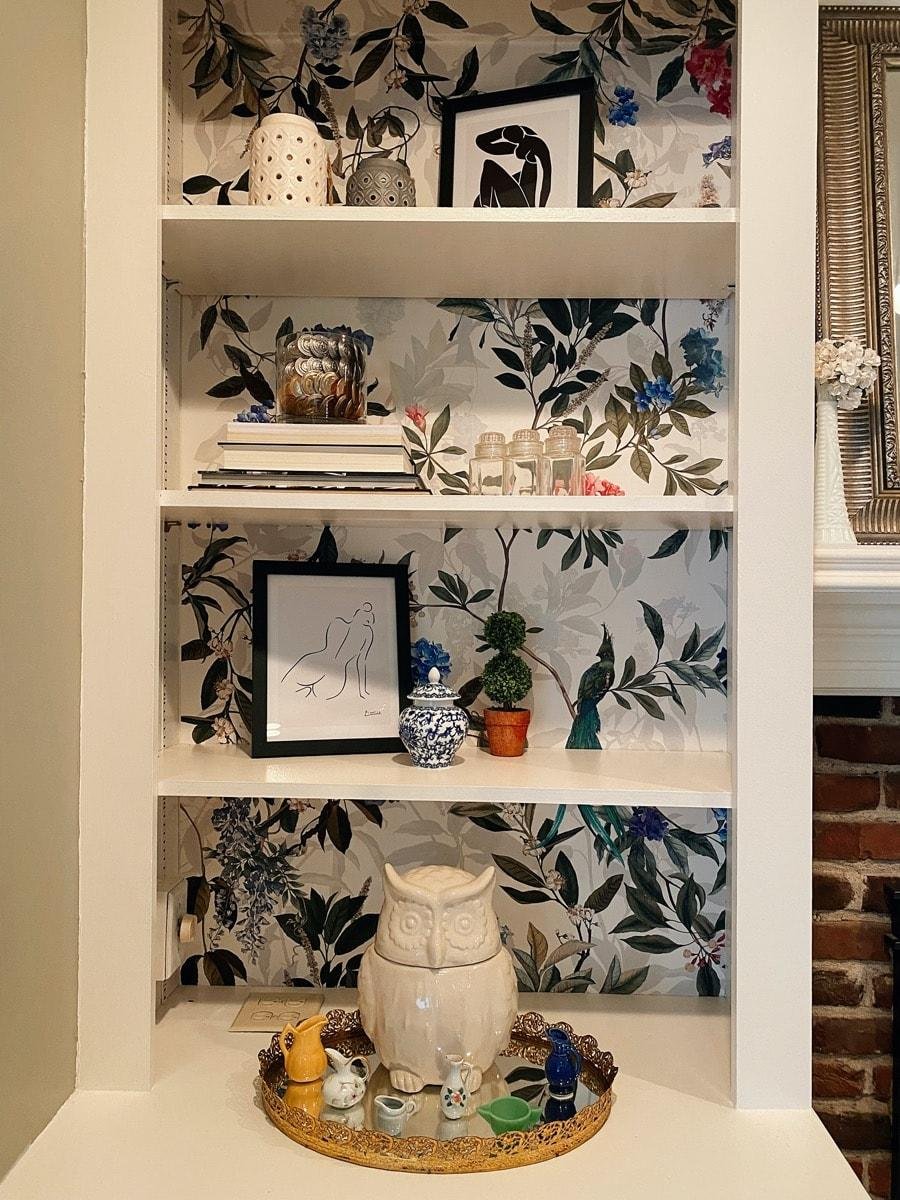
To enhance my new wallpaper, I had fun trying out new decor arrangements to compliment the space. I worked in some of my favorite decor items- keepsakes and family heirlooms, as well as a few new fun pieces I found to compliment my new wallpaper.
I loved the process of using the wallpaper as a piece of art, and working in the items around the beautiful features like birds and blossoms.
A big thank you to Photowall for collaborating with me for this post! I was really impressed with the high quality and durability or their products, and their customer service was awesome. Every tiny question I had was answered quickly via email, so that when I placed my order I was 100 percent confident in my choice.
Founded as a family company, Photowall is based Sweden but ships all over the world. Their wallpapers are fully customizable and made to order so you have total control over the final product.
I could easily add my measurements, and choose the exact area from the pattern I wanted on my walls. Seeing a preview the area that would be printed was super helpful, and a feature I’ve never seen before when ordering wallpaper online!
Once I learned about their environmental efforts to keep their products low impact, I could really tell how passionate their team is, while helping people create beautiful homes.
Serously the only difficult part of this process was choosing the wallpaper because they have so many beautiful designs!
Stay tuned as I transform other walls in my home with their gorgeous wallpaper, and I’ll be sharing those images here on my website and over on my instagram profile!
Want your own Photowall Wallpaper?
Photowall is giving my readers a 25% discount on any product on their website for the next 2 months, from August 30 to November 1, 2021. Just use code “flourishmentary25″ (case sensitive) at checkout to save!
They also have a great selection of canvas prints and posters to help you makeover any wall in your home!
Have you ever added wallpaper on bookshelves? If so, let me know how it went in the comments below!
- Vintage Kitchen Decor: 11 Easy Ways to Bring In Retro Charm
- Coffee Bar Ideas: 21 Ways to Create a Sophisticated Setup
- 17 Classic Christmas Decor Ideas For Elegance in Every Room
- 10 Simple Bedroom Refresh Ideas for a Whole New Look
- How To Pack A Suitcase Like A Travel Pro: Essential Tips from a Travel Agent



Share Your Thoughts